
Simple Lighting Techniques For Shooting Portraits
The ability to shoot the perfect portrait doesn’t come overnight. You need to become expert especially in important factors such as posing and lighting.
Even if you are planning to capture portraits at home, you can still implement studio lighting setups for better results. This great tutorial shows you some simple studio lighting techniques for capturing great portraits at home.
Read through the article, check out the photos and let us know about your valuable thoughts!
If you’re looking to take your photography further you’ll probably want to learn how to use off-camera flash. In this tutorial we show you 6 simple studio light setups that will help you capture some of the classic portrait lighting effects.
What’s more, these lighting techniques will provide you with a solid foundation from which you can start experimenting to find your own style.
In our lighting setups cheat sheet below you’ll learn how to use high contrast light at a 90-degree angle; diffused light and a reflector; high contrast light at 45 degrees; high contrast light at 45 degrees with a reflector; low contrast light at 45 degrees with a reflector; and finally rim lighting from behind.
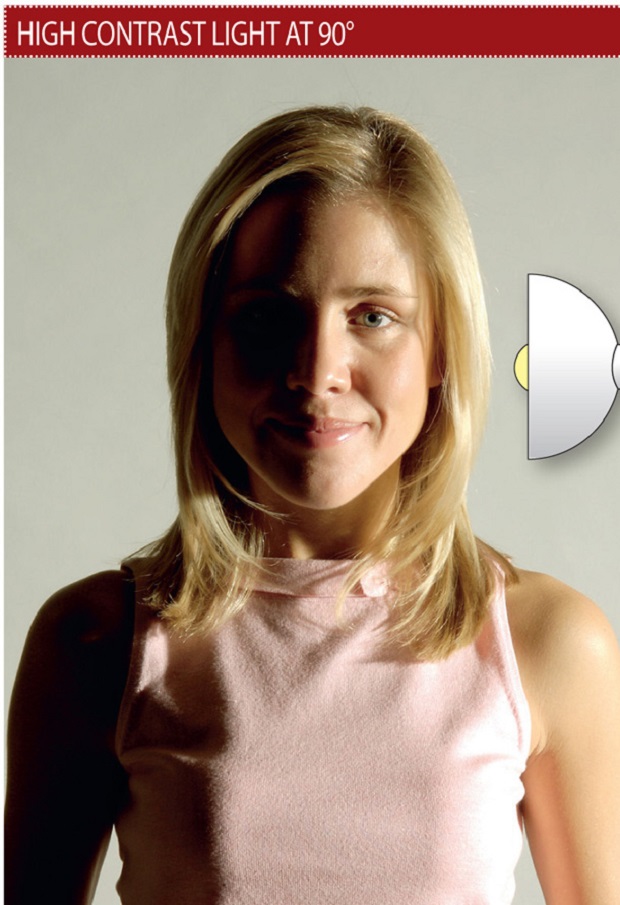
Lighting Setup 1: High contrast light at a 90-degree angle
A striking result achieved with minimal kit. Using a single flash head at this angle can give an unflattering result, though.
The light will show up bumpy skin textures and create stark shadows and bright highlights.
Without a diffuser, the quality of light will be high contrast and if placed near the subject will create problems with fall-off where light is spread unevenly across the face.
By not using a reflector, shadows will be deep.
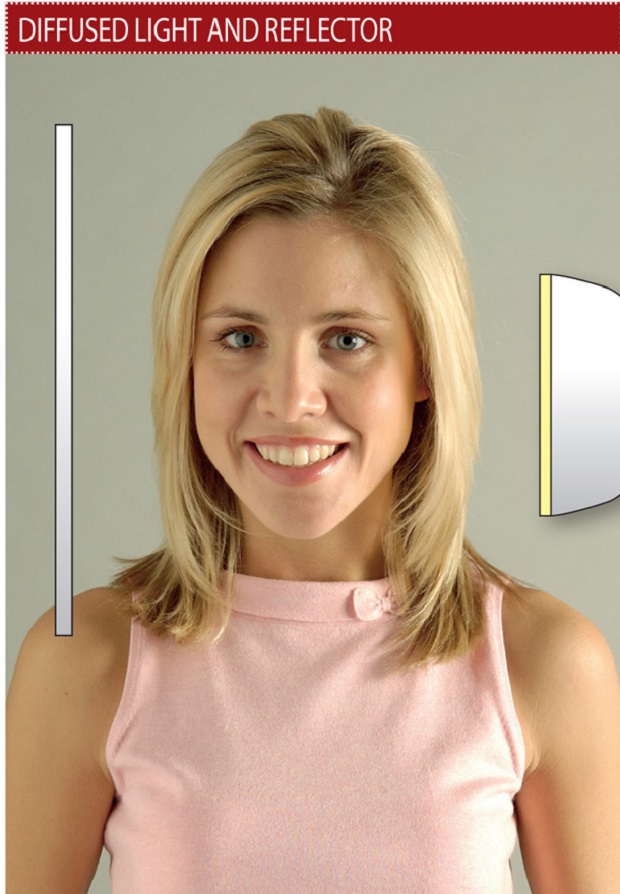
Lighting Setup 2: Diffused light and a reflector
This is a much gentler set-up where the same light source is softened with a diffuser and a reflector.
Diffusers give the same effect as daylight cloud cover, spreading light from a tiny source into a larger area.
The diffuser will reduce the intensity of your flash unit, so you may need to slide up the output of the flash head, but the effect will be more flattering.
The reflector works by bouncing stray light back onto the unlit side of the face.
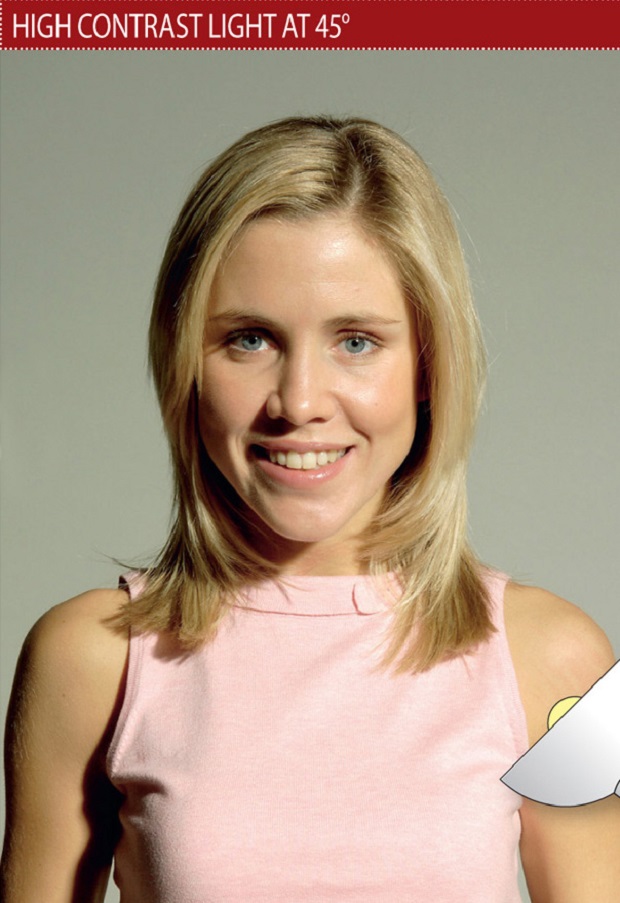
Lighting Setup 3: High contrast light at 45 degree
With a similar effect to the first shot, this type of lighting reveals a bit more of the sitter’s facial characteristics, but with the same pockets of deep shadow.
Positioned at less of an acute angle, this light won’t pick up so much skin texture but it won’t show the face in any kind of flattering aspect, regardless of the pose.
Only one half of the face will be illuminated and, without any reflector, the other half will become a silhouette.
……………….
Read the full article here at DigitalCameraWorld.com, learn all the 6 lighting techniques and see all the image:
6 simple lighting setups for shooting portraits at home (plus free cheat sheet)
Credits:
Article Source: 6 simple lighting setups for shooting portraits at home (plus free cheat sheet)